


A WooCommerce to Shopify migration moves your products, customers, orders, and content from a self-hosted WordPress store to Shopify’s hosted platform. Done properly, it takes 1 to 4 weeks for most stores, keeps your Google rankings, and causes zero downtime for customers.
I’m Anurag Pandey, founder of ControlF5. Our team has moved WooCommerce stores of every size to Shopify, from 50-product boutiques to catalogs with thousands of variants. Most problems we fix come from the same few mistakes: missing redirects, broken variants, and customers who can’t log in after launch.
This guide shows you how to migrate WooCommerce to Shopify step by step, including:
Most store owners switch from WooCommerce to Shopify for one reason: they want to spend time selling, not maintaining a website. WooCommerce is flexible, but you manage hosting, security, plugin updates, and speed yourself. Shopify handles all of that for a monthly fee.
| Factor | WooCommerce | Shopify |
| Hosting | You buy and manage it | Included |
| Security and SSL | Your responsibility | Included, PCI compliant |
| Updates | Core, theme and plugin updates, often conflicting | Automatic |
| Speed | Depends on host and plugins | Fast global CDN included |
| Checkout | Plugin-based | Shopify Checkout, Shop Pay |
| Apps and features | Plugins, variable quality | Shopify App Store |
| Support | Forums, host, developers | 24/7 Shopify support |
| Best for | Stores needing deep custom code | Stores that want to grow with less maintenance |
Still deciding? Read our full Shopify vs WooCommerce comparison before you start.
Most of your store data can move from WooCommerce to Shopify, but a few items need extra work or can’t be transferred at all. Knowing this upfront prevents surprises after launch.
| Data | Can it migrate? | How |
| Products, variants, images, SKUs, prices, inventory | Yes | CSV import, Shopify’s migration app or a migration app |
| Product categories | Yes | Become Shopify collections |
| Product attributes and custom fields | Yes, with mapping | Shopify options (max 3 per product) and metafields |
| Customers and addresses | Yes | CSV import or migration app |
| Order history | Yes | Migration app (Matrixify, LitExtension, Cart2Cart) |
| Product reviews | Yes | Review app import (Judge.me, Loox, Yotpo) |
| Blog posts and pages | Yes | Migration app or manual copy |
| Coupons and gift cards | Partly | Recreate discounts in Shopify; gift cards depend on the app |
| Customer passwords | No | Encrypted; customers reactivate their accounts |
| Plugin features (subscriptions, bookings, product add-ons) | No | Replace with a Shopify app |
| Theme design | No | Rebuild in a Shopify theme |
Two Shopify limits matter most for WooCommerce stores:
There are three ways to migrate WooCommerce to Shopify. The right one depends on your catalog size, your budget and how much of the technical work you want to do yourself.
Export CSV files from WooCommerce and import them into Shopify, either through Shopify’s own migration app or Shopify’s product CSV template. It’s free, but customer and order files need reformatting to match Shopify’s templates, and orders usually need an app anyway. Best for small catalogs with simple products.
Apps like Matrixify, LitExtension and Cart2Cart connect to your WooCommerce store and move products, customers, orders and often blog posts automatically. They’re paid, usually priced by the number of records, and most offer a free demo migration so you can check the results first. Best for stores with order history or a few thousand products.
An agency plans the data mapping, runs the migration, rebuilds your theme, sets up redirects and tests everything before launch. It costs the most, but it’s the safest option for stores with custom plugins, large catalogs, subscriptions or strong Google rankings to protect. See our Shopify migration services.
| Method | Cost | Time | Skill needed | Best for |
| Manual CSV | Free | 2–5 days | Medium (spreadsheets) | Under ~100 simple products |
| Migration app | Paid, by record count | 1–3 days for data | Low to medium | Stores with order history and standard setup |
| Shopify expert | Project-based | 2–6 weeks including design and QA | None | Large, custom or SEO-critical stores |
Good preparation prevents almost every migration problem. Complete these tasks before you move any data.
Create a full backup of your database and files with a plugin like UpdraftPlus or your hosting control panel. Keep it until at least a month after launch.
Crawl your site with Screaming Frog or Ahrefs Site Audit, or export your XML sitemaps, and save every product, category, page and blog URL in a spreadsheet. You’ll need this list to build 301 redirects in Step 8. Also export your top landing pages from Google Search Console so you know which URLs matter most.
List every page you need to keep, every active plugin and every third-party tool (email, payments, shipping, reviews, subscriptions, accounting). For each plugin, find the Shopify app that replaces it.
Delete old test products, duplicate customers and discontinued items before you export. Migrating clean data is faster and cheaper, since most migration apps charge by the number of records.
Schedule your launch for a quiet sales period. Avoid Black Friday, Cyber Monday and your own peak season.
Your new Shopify store needs to be ready before it can receive data.
New to Shopify? Our guide to starting your first Shopify store covers setup in more detail.
Next, export WooCommerce data into files that Shopify or a migration app can read. If you use a migration app, you can skip most of this step, since the app pulls data directly from WooCommerce.
In WordPress, go to Products → All Products → Export. Choose the columns and categories to include, then click Generate CSV. Shopify’s migration app can read this file without changes.
WooCommerce’s built-in exporter only handles products. To export customers and orders, use a plugin such as WP All Export, then reformat the columns to match Shopify’s customer CSV template.
WordPress content and reviews don’t export in a Shopify-ready format. Use a migration app, copy key pages manually, and import reviews through your Shopify review app.
Now move your data into Shopify. Always run a test import first, check the results, then run the full import.
Shopify offers a first-party migration app that imports your WooCommerce product CSV with a few clicks. It handles products well, but customers and orders need separate work.
Matrixify imports products, customers, orders, redirects, blog posts and metafields from spreadsheets, and can read WooCommerce exports. It’s our choice for large catalogs because every field can be checked in a spreadsheet before import.
LitExtension and Cart2Cart connect to WooCommerce directly and move data automatically, with no spreadsheets. Run their free demo migration first. Compare more tools in our list of Shopify migration apps.
After the import, compare record counts: the number of products, variants, customers and orders in Shopify should match WooCommerce.
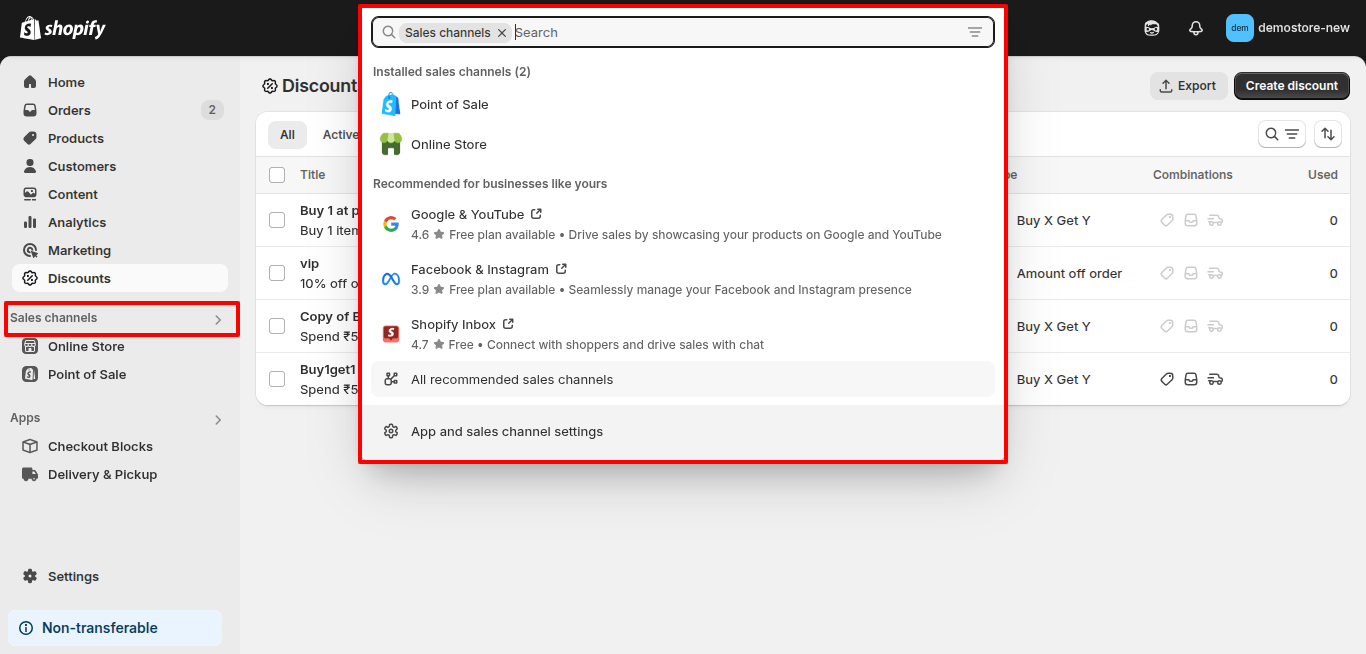
WooCommerce categories become Shopify collections, but the structure rarely transfers perfectly.
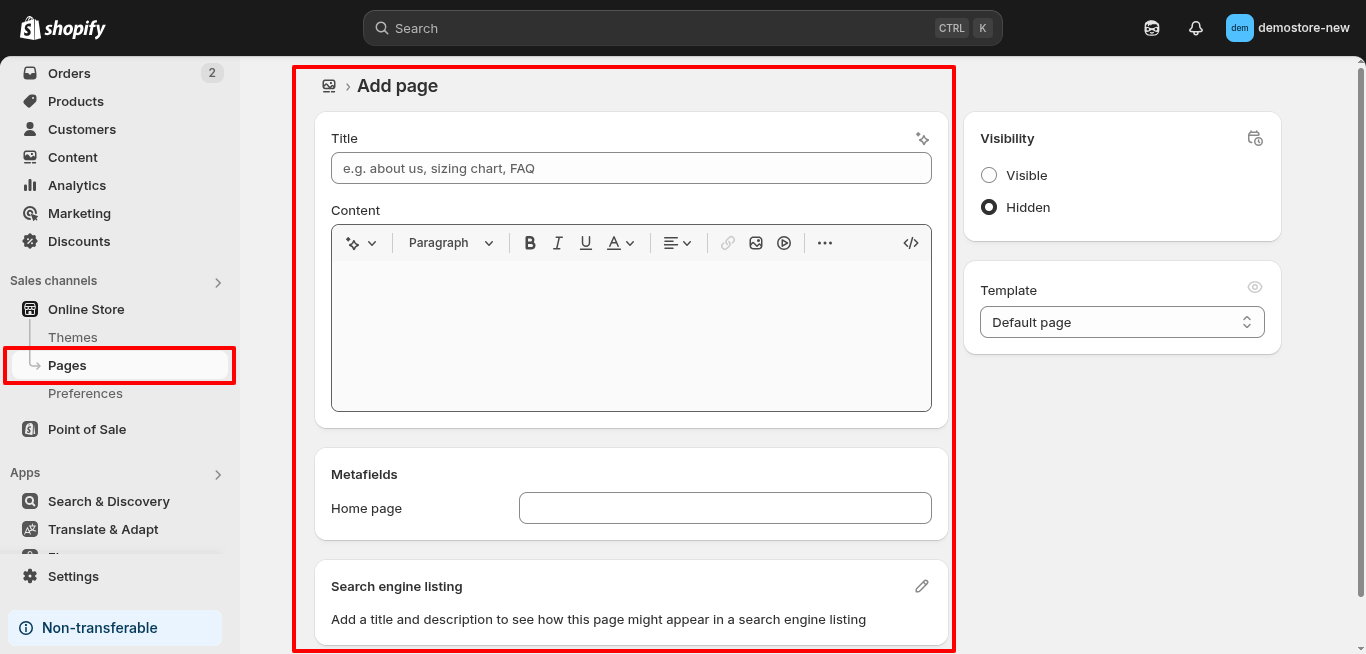
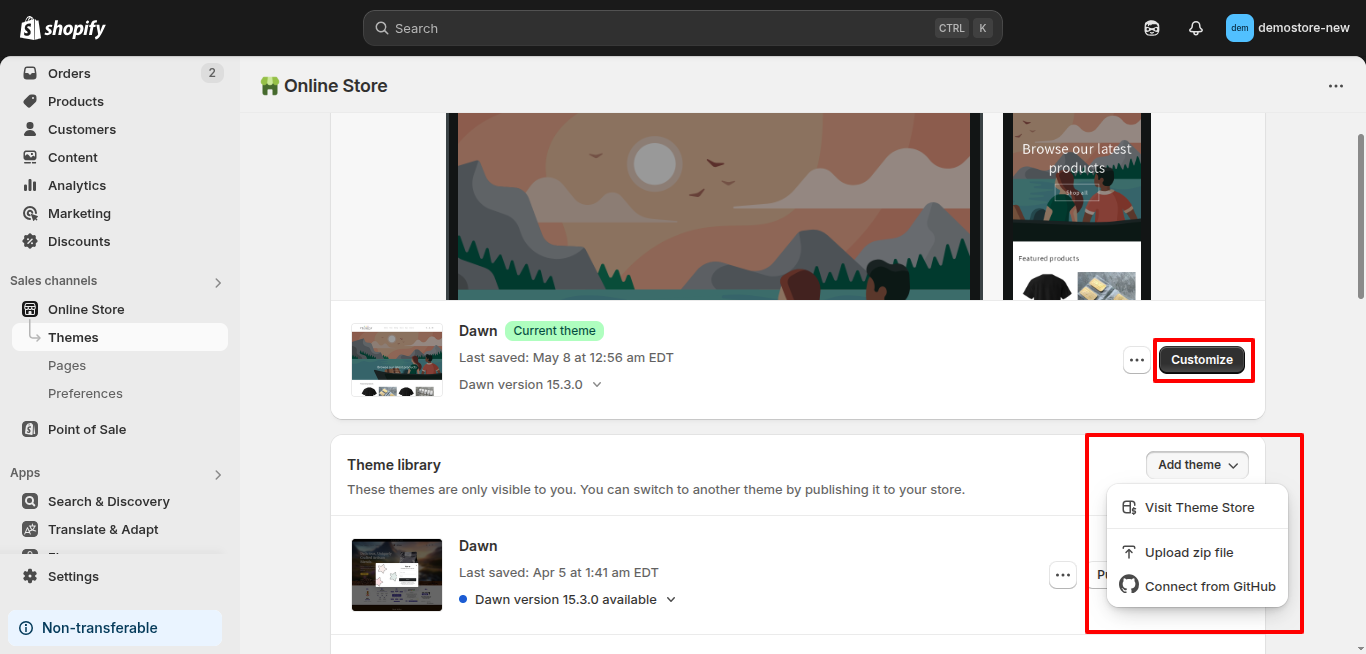
Your WooCommerce theme can’t be moved, so the design is rebuilt in Shopify.
This is also the right time to improve the design. Most of our clients use the migration to fix the conversion problems they had on WooCommerce. See our top Shopify themes for ideas.
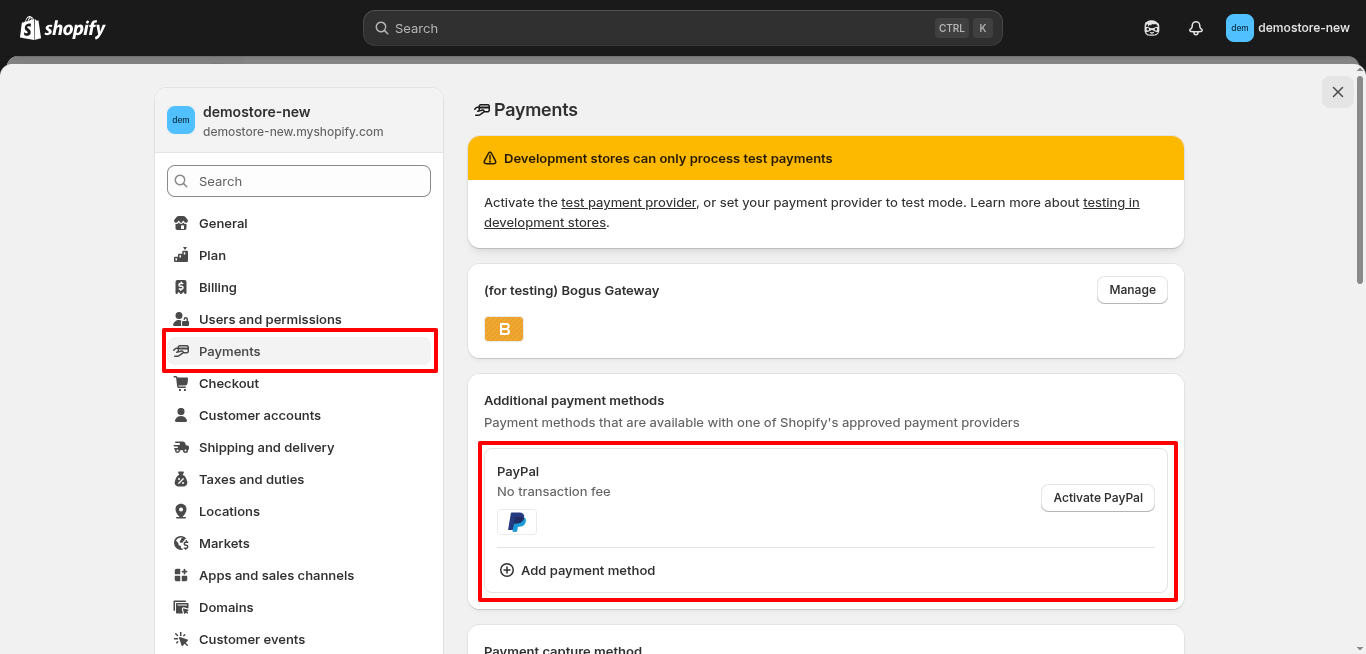
Make your store ready to take orders.
Go to Settings → Payments. Activate Shopify Payments where available, and add PayPal. Indian stores can use Razorpay, PayU or other Shopify payment gateways for India. You can also add Buy Now Pay Later apps.
Go to Settings → Shipping and delivery. Create shipping zones and recreate your WooCommerce rates: flat rate, free shipping above a minimum order, weight-based or carrier-calculated. See our list of Shopify shipping apps.
Go to Settings → Taxes and duties. Turn on automatic tax calculation where Shopify supports it, and add your tax registration details (for example, GST for Indian sellers).
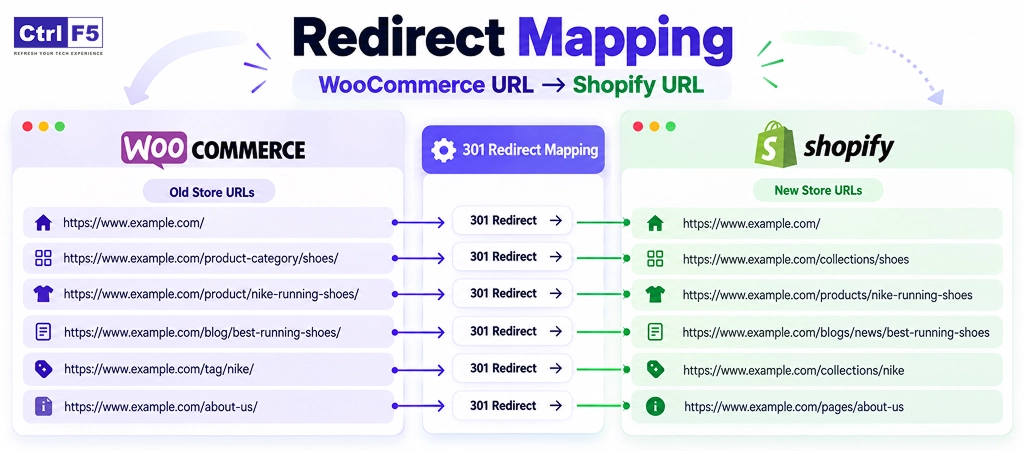
This is the step that protects your Google rankings. Shopify uses fixed URL structures, so almost every WooCommerce URL changes. Without 301 redirects, Google and returning customers land on 404 pages, and the rankings you’ve built can drop within days.
Use this table to map your old WooCommerce URLs to their new Shopify paths. Your exact WooCommerce URLs depend on your permalink settings, so check them against the URL list from Step 1.
| Page type | Typical WooCommerce URL | Shopify URL |
| Product | /product/blue-cotton-shirt/ | /products/blue-cotton-shirt |
| Product category | /product-category/shirts/ | /collections/shirts |
| Sub-category | /product-category/men/shirts/ | /collections/mens-shirts |
| Product tag | /product-tag/summer/ | /collections/all/summer |
| Shop page | /shop/ | /collections/all |
| Page | /about-us/ | /pages/about-us |
| Blog post | /how-to-style-shirts/ | /blogs/news/how-to-style-shirts |
| Blog category | /category/style-tips/ | /blogs/news/tagged/style-tips |
| Cart | /cart/ | /cart |
| My account | /my-account/ | /account |
Shopify only applies a redirect when the old path returns a 404. If a live Shopify page already exists at that path, the redirect is ignored.
Move your SEO titles, meta descriptions and image alt text across with the products. Most migration apps can map Yoast or Rank Math fields to Shopify’s SEO fields. Check that nothing is truncated or duplicated after import.
Old blog posts still link to WooCommerce URLs. Crawl the new store with Screaming Frog or Ahrefs Site Audit, filter for redirects and 404s, and update each link to its new Shopify URL.
After launch, submit yourdomain.com/sitemap.xml in Google Search Console. Shopify generates and updates the sitemap automatically.
Want this handled for you? Every ControlF5 migration includes SEO-safe Shopify migration with full redirect mapping and 30 days of Search Console monitoring.
Test everything while the store is still password-protected. Your WooCommerce store keeps selling in the meantime.
When testing is complete, point your domain to Shopify.
Customer passwords can’t be migrated, because WooCommerce stores them encrypted. With Shopify’s customer accounts, customers sign in with a one-time code sent to their email. If you use legacy accounts instead, send an account activation email. Either way, email customers at launch so they aren’t confused at login.
The first 30 days after launch decide whether your migration keeps its traffic. Work through this list:
Launch day
First week
First 30 days
WooCommerce to Shopify migration costs range from free, if you do it yourself with CSV files, to a few thousand dollars for an agency-led migration with a new design. The biggest cost drivers are catalog size, order history, custom features and design work.
| Cost item | DIY (CSV) | Migration app | Shopify expert |
| Data migration | Free | Paid, by number of records | Included |
| Shopify plan | Monthly subscription | Monthly subscription | Monthly subscription |
| Theme | Free or paid theme | Free or paid theme | Custom or customized theme |
| Apps replacing plugins | Monthly app fees | Monthly app fees | Monthly app fees |
| Redirects and SEO | Your time | Your time (some apps help) | Included |
| Typical total | Your time + subscriptions | App fee + subscriptions | [From $X, set by ControlF5] |
For an exact figure, ask ControlF5 for a free migration quote.
| Store size | Products | Typical timeline |
| Small | Under 500 | 1–2 weeks |
| Medium | 500–5,000 | 2–4 weeks |
| Large or Shopify Plus | 5,000+ or complex integrations | 4–8 weeks |
Data transfer itself usually takes hours to a few days. Most of the time goes into theme design, app setup, redirect mapping and testing.
These are the mistakes we fix most often when stores come to us after a DIY migration.
We migrated The Alpine Apothecary’s full WooCommerce store to Shopify, redesigned it, and improved site speed and the shopping experience for their wellness community. Products migrated: 250+ · Timeline: 6 weeks · Result: 45% faster load time. Read the full case study.
This Furst Gear brand struggled with slow performance and backend issues on WooCommerce. After the move to Shopify, they gained easier store management, stronger SEO, and higher conversions. Conversion rate went up by 28% within 3 months of launch. Read the case study.
A DIY migration works well for small, simple stores. If your store has thousands of products, order history, custom plugins or Google rankings you can’t afford to lose, a specialist migration is the safer path.
ControlF5’s Shopify migration experts handle the full move: data mapping, product and customer migration, theme rebuild, 301 redirects, testing and launch, with zero downtime and SEO protection included.
Get a free WooCommerce to Shopify migration quote →
Answer: Most small stores migrate in 1–2 weeks, medium stores in 2–4 weeks and large or Shopify Plus stores in 4–8 weeks. The data transfer takes hours to days; design, redirects and testing take the rest.
Answer: A DIY migration with CSV files is free apart from your Shopify plan and apps. Migration apps charge by the number of products, customers and orders. Agency migrations are priced per project based on catalog size, design and integrations.
Answer: Not if you set up 301 redirects from every old URL to its new Shopify URL and keep your titles, meta descriptions and content. Small ranking changes for a few weeks are normal while Google recrawls the site.
Answer: No. Passwords are stored encrypted and can’t be transferred by any tool. Customer accounts, addresses and order history do migrate. Customers sign in on Shopify with an email code or activate their account.
Answer: Yes. Apps like Matrixify, LitExtension and Cart2Cart migrate past orders with their line items, totals and statuses, so customers keep their history and your reports stay complete.
Answer: Matrixify is best for large catalogs and full control through spreadsheets. LitExtension and Cart2Cart are easier for non-technical users because they connect to WooCommerce directly. Shopify’s own migration app is a free option for products.
Answer: Yes. Blog posts can move to Shopify’s built-in blog with a migration app or manually. Redirect each old post URL to its new /blogs/news/ URL to keep its rankings.
Answer: For most growing stores, yes. Shopify removes hosting, security and plugin maintenance, and gives you a fast, reliable checkout. WooCommerce can still suit stores that depend on heavy custom code or WordPress-specific features.






Is your Shopify store loading slowly? Explore 11 hidden causes that affect website speed and learn how to fix common performance issues.
In this blog, I am sharing the BFCM strategies 2026 and offer tips that I have seen work again and again.

Below are 10+ of the best white label WordPress agencies in the USA, picked using things you can actually verify: Clutch ratings, founding years, real named clients, and what they specialize in. No fluff, no “trust us.”