


Jewellery shoppers judge a brand by its presentation first. A clean, premium Shopify store can instantly build trust, highlight craftsmanship, and improve conversions across mobile and desktop.
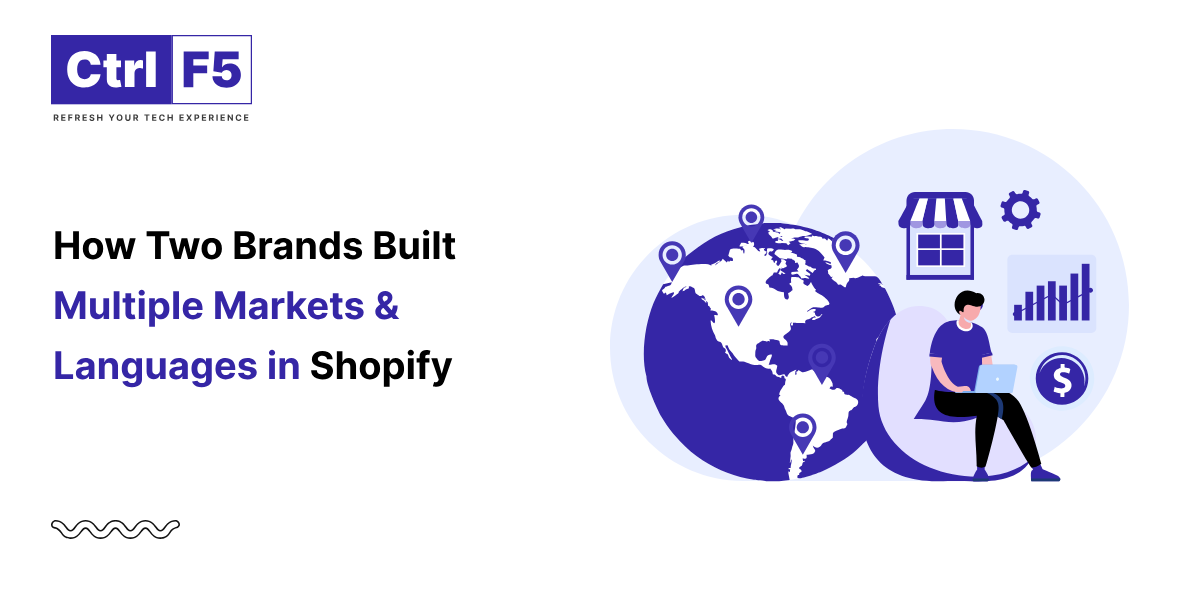
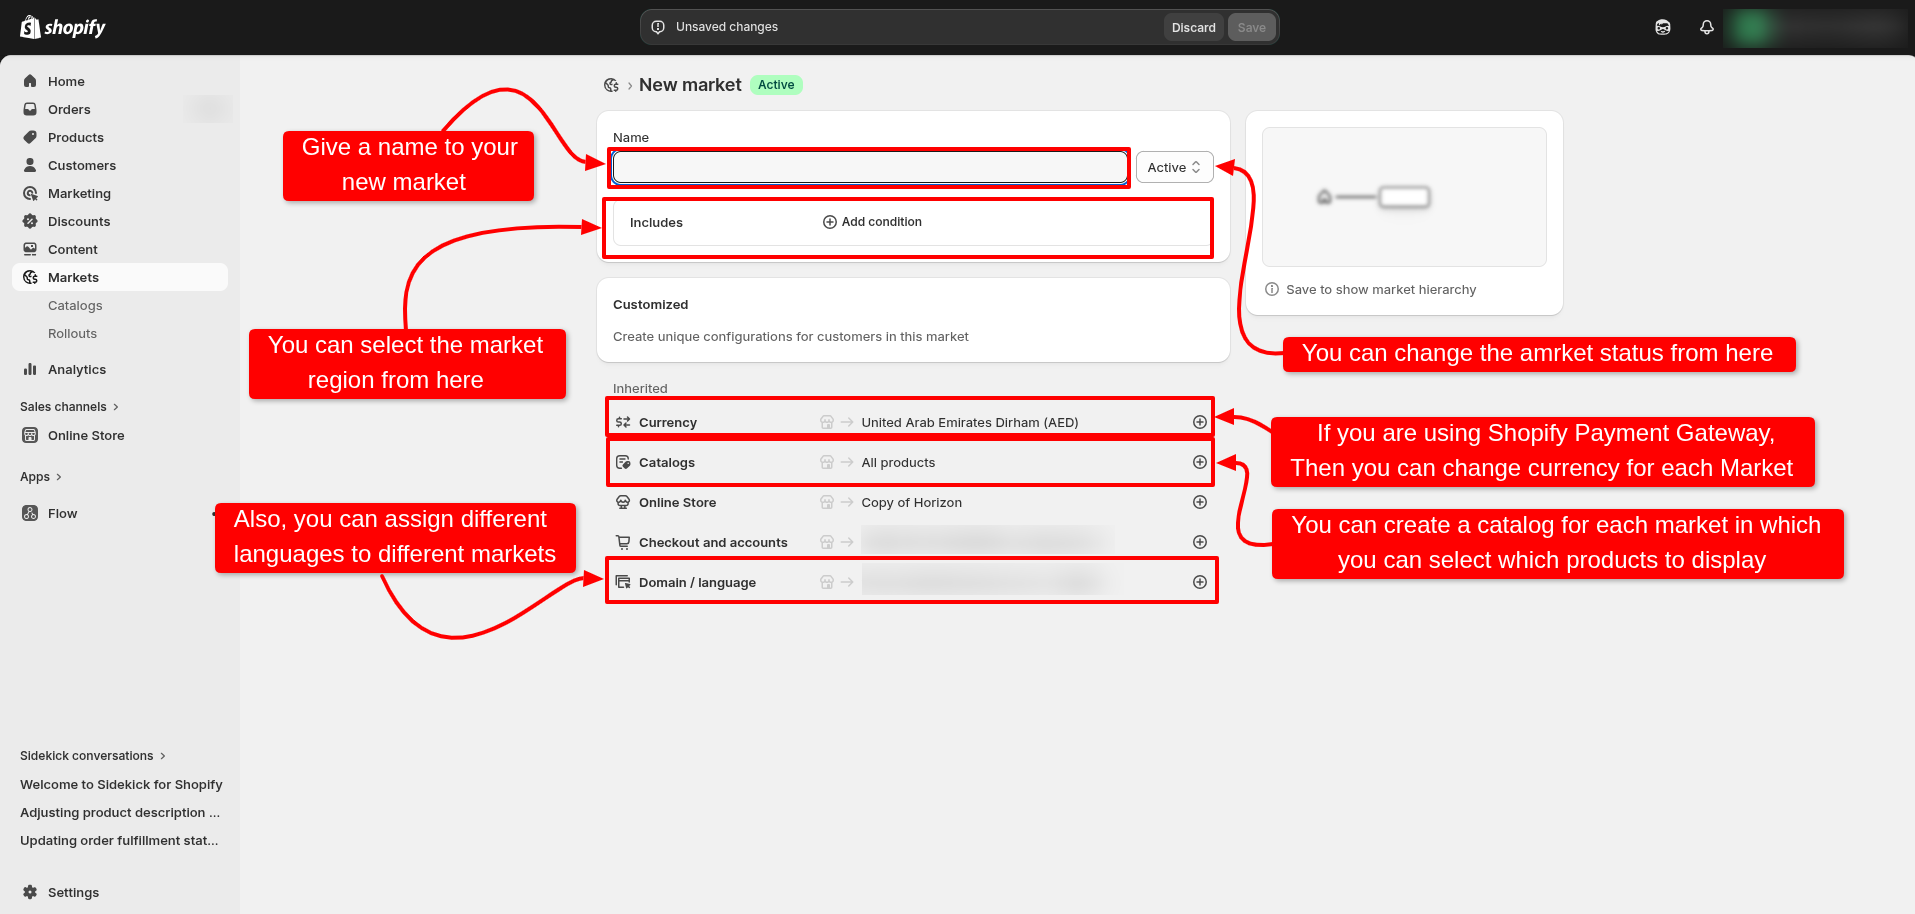
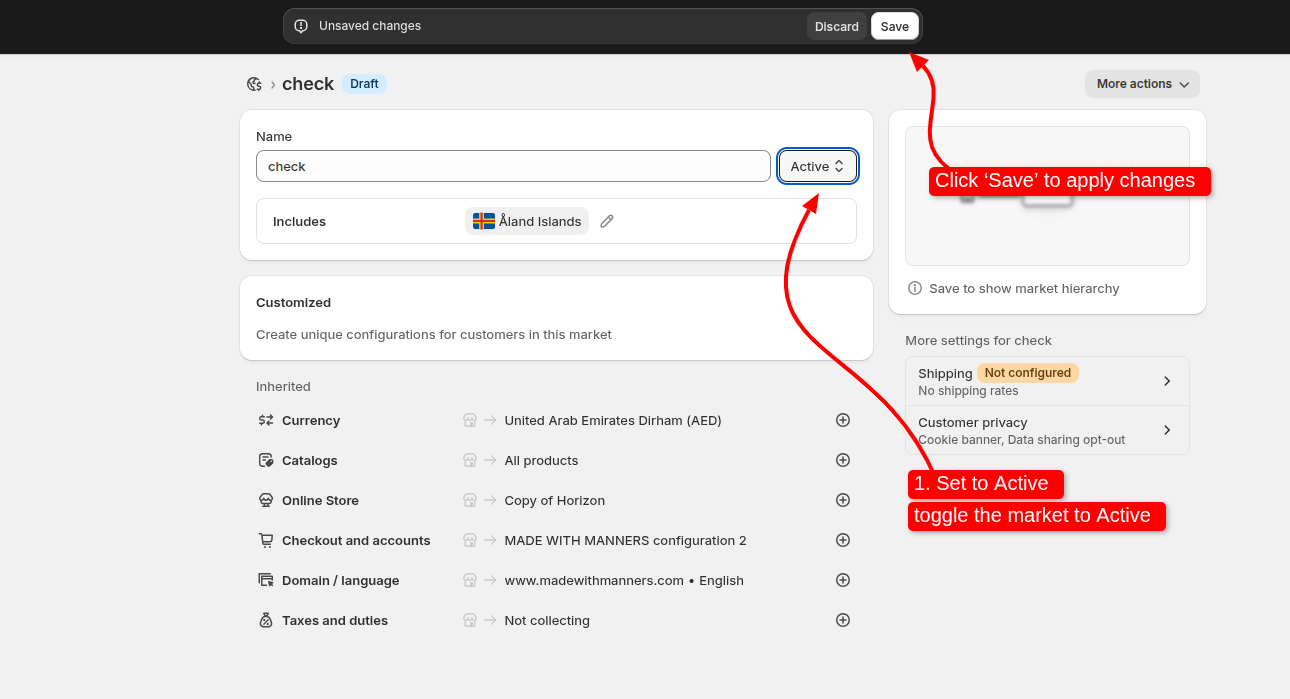
SHOPIFY MARKETS Multi-Market & Multi-LanguageCase Study Collection Dubai • Qatar • Bahrain • United Kingdom Made With Manners · Yalla Toyshow two brands build multiple

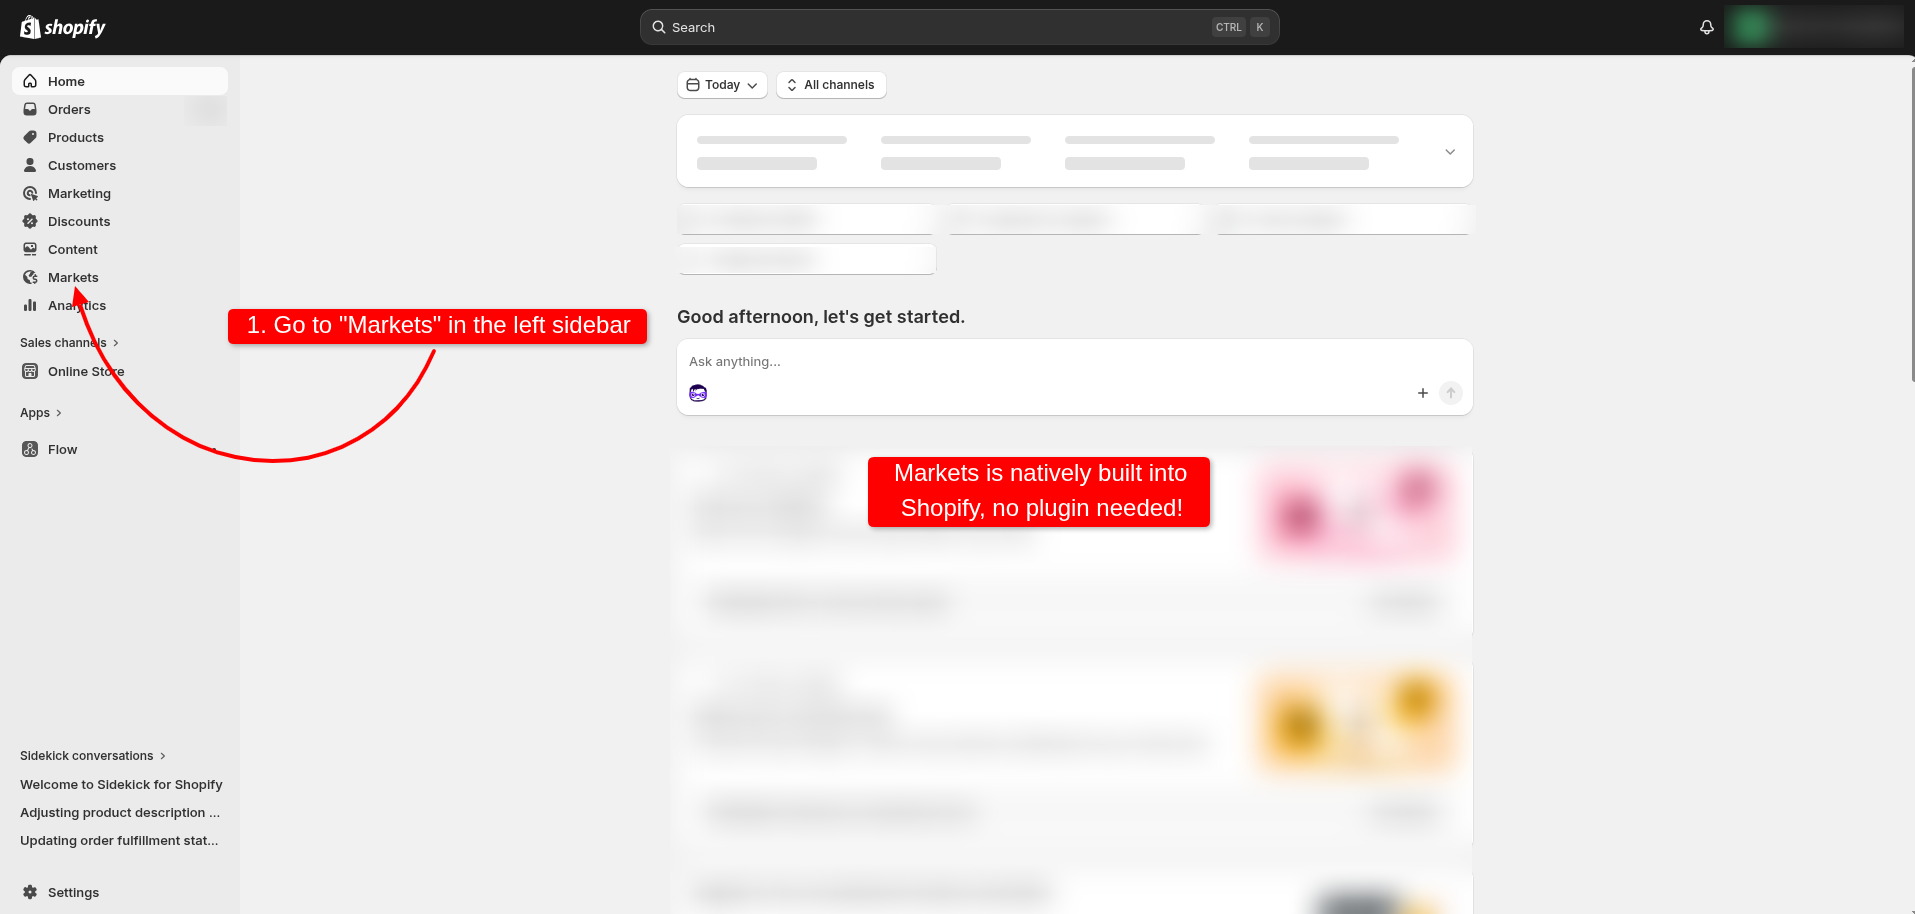
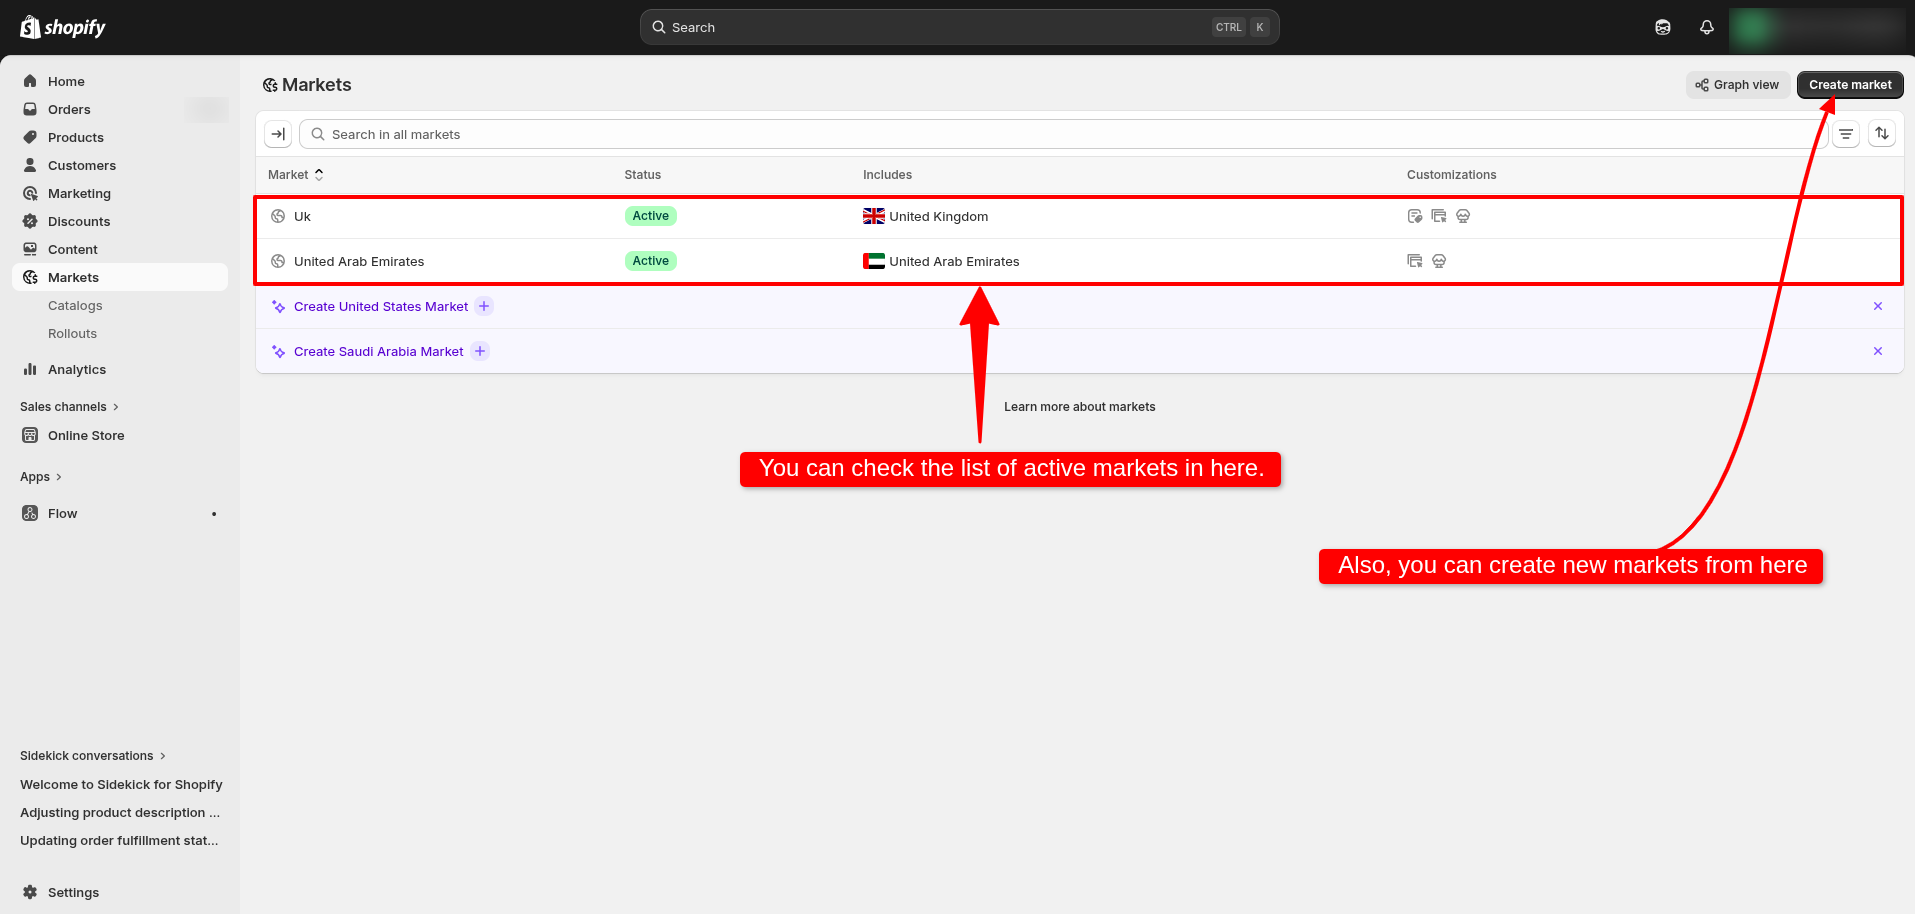
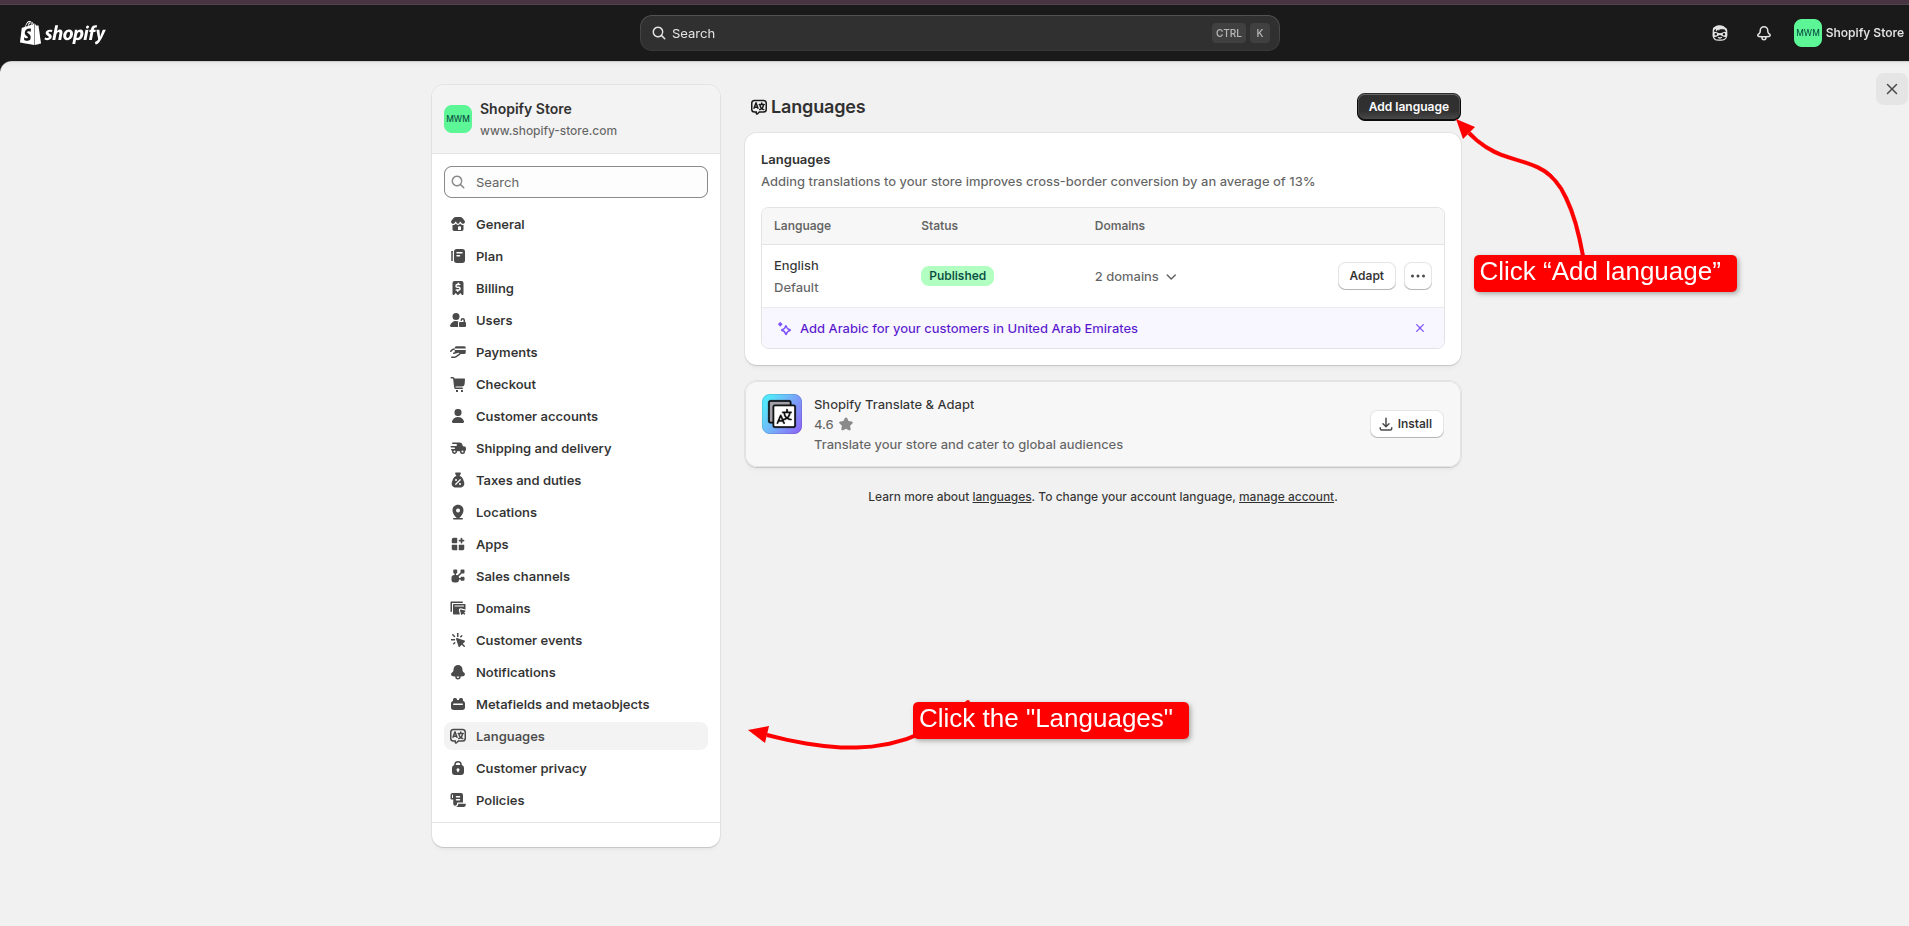
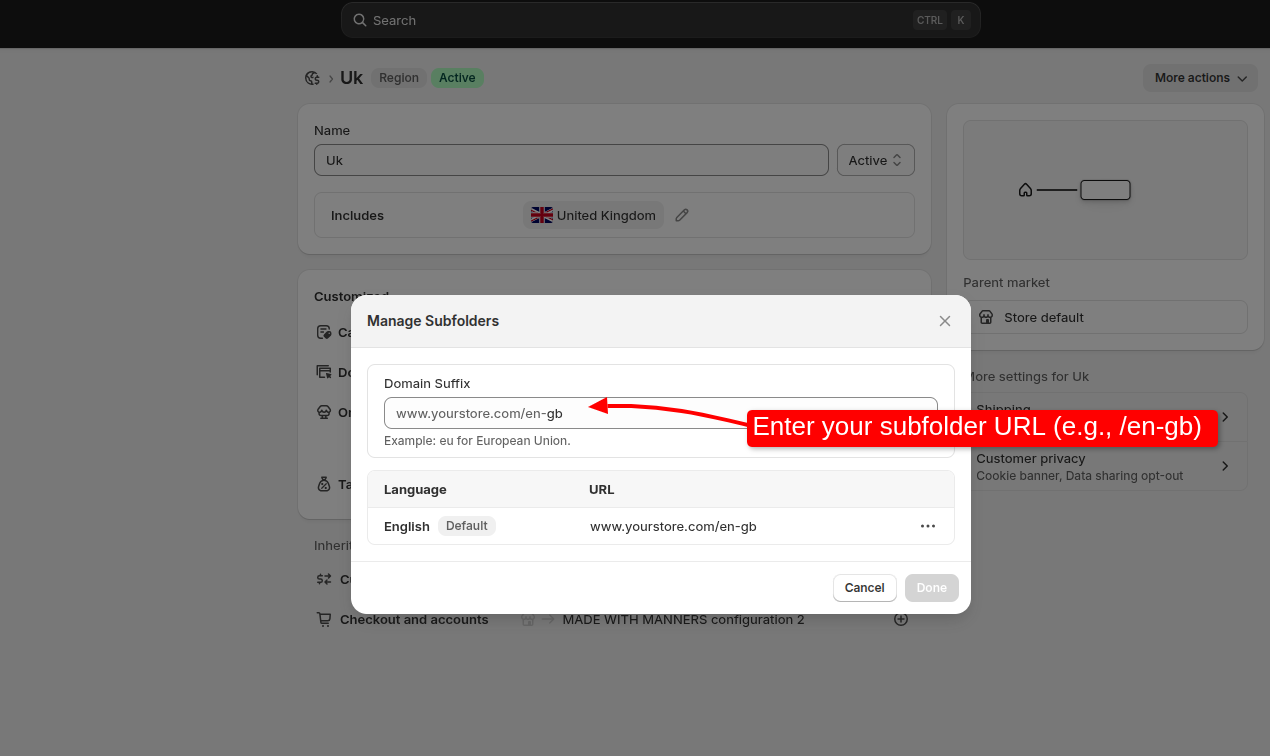
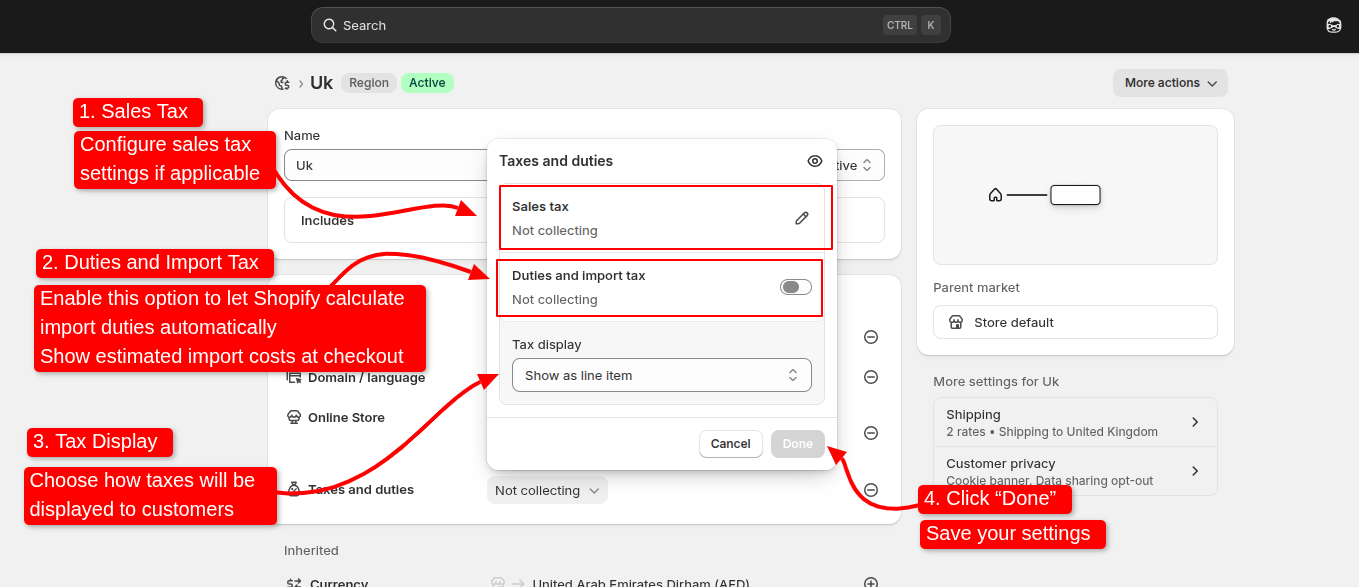
Here’s something a lot of Shopify merchants figure out the hard way: setting up Shopify Markets gets you localized pricing and language.